
Concepts and scripts.
Before talking about and outlining the scripts and what they do and how they are enacted within the live iso based versions of Suda its necessary to ask what Suda does and why.
The operating system itself starts and goes through its usual boot routine but then is set up so that before we reach the desktop it launches two scripts for networking, in all three versions the most important networking script is based on bringing up X11vnc which allows us to access the source computer ( in the online version as well as the iso versions) via another computer via the internet ( online Suda) and via a local network ( LAN, wireless or wired) via a vncvewer such as Tigervnc - this leverages basic Linux functionality allowing us to view and interact with a desktop remotely. A better view of how this works can be found here https://wiki.archlinux.org/title/X11vnc .
The next thing before login to launch is noVNC, it has to start after X11vnc, and this enables the same functionality of X11vnc but allows us to access the desktop via a web browser, and this is at the core of the online version of Suda. Im not going to go into it too much here ( I cover it in the Trisquel Suda page) but for completeness sake here is the noVNC site https://novnc.com/info.html .
After login ( which is automatic on the isos and built in to the way online Suda works) these scripts are launched glitchify.sh, sudacam1.sh, sudacam2.sh ( this differs slightly from the online version but its a way around a scripting problem I found using various versions of linux distributions) then finally manifesto.sh as we want the vim window that creates foregrounded.
Glitchify.sh
glitchify.sh uses a flaw in lxdm not present in other display managers, such as lightdm or slim which upon issuing the command via terminal or script 'xsetroot -bg grey' instantly turns the desktop into a live glitch environment, each window opened and moved leaving behind a trace or trail . For instance this ( from an earlier experiment using twn instead of ctwm)
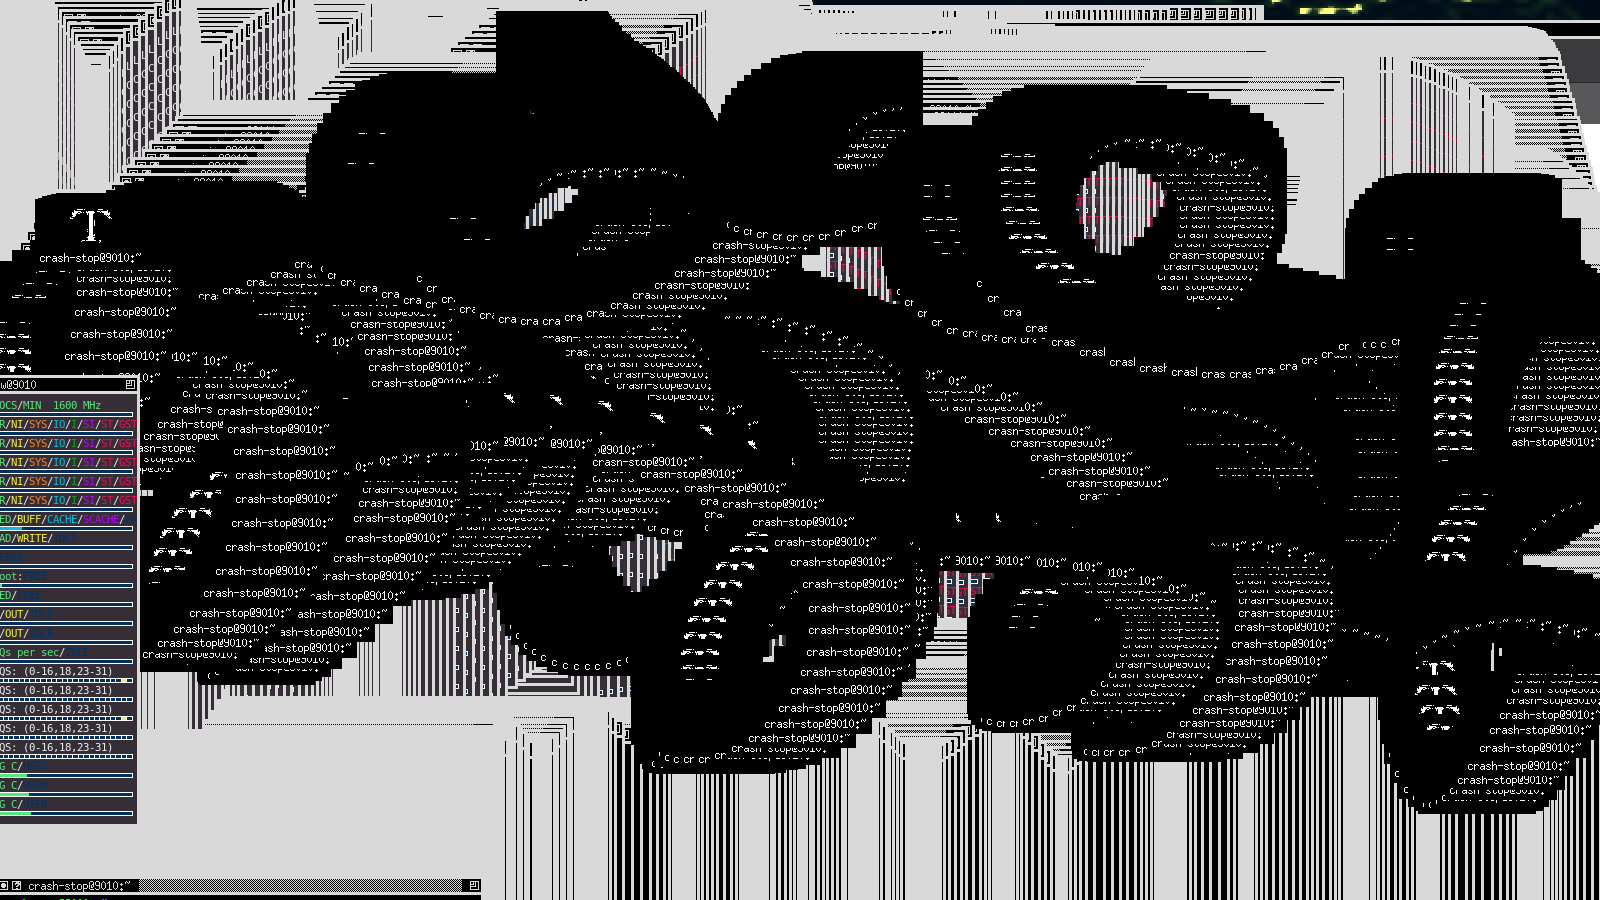
The results from this one script alone convinced me that this was an avenue worth exploring and indeed a lot of the techniques discovered collectively through working on suda have gone on to inlfuence and change the way that I work.
What should xsetroot actually do when its behaving itself wellll if we read the man page for it we find 'The xsetroot program allows you to tailor the appearance of the background ("root") window on a workstation display running X' - from this handy page https://linux.die.net/man/1/xsetroot - so essentially its a way of changing the colour or pattern of the desktop so glitchify.sh should just change the background (-bg) to grey (-grey) and if you aren't running lxdm thats exactly what it does. Whatever way lxdm handles the background this is the result (even if you change the default background globally via the /etc/lxdm/default.conf file ( though I write about that in a different section).
Sudacam 1 and 2
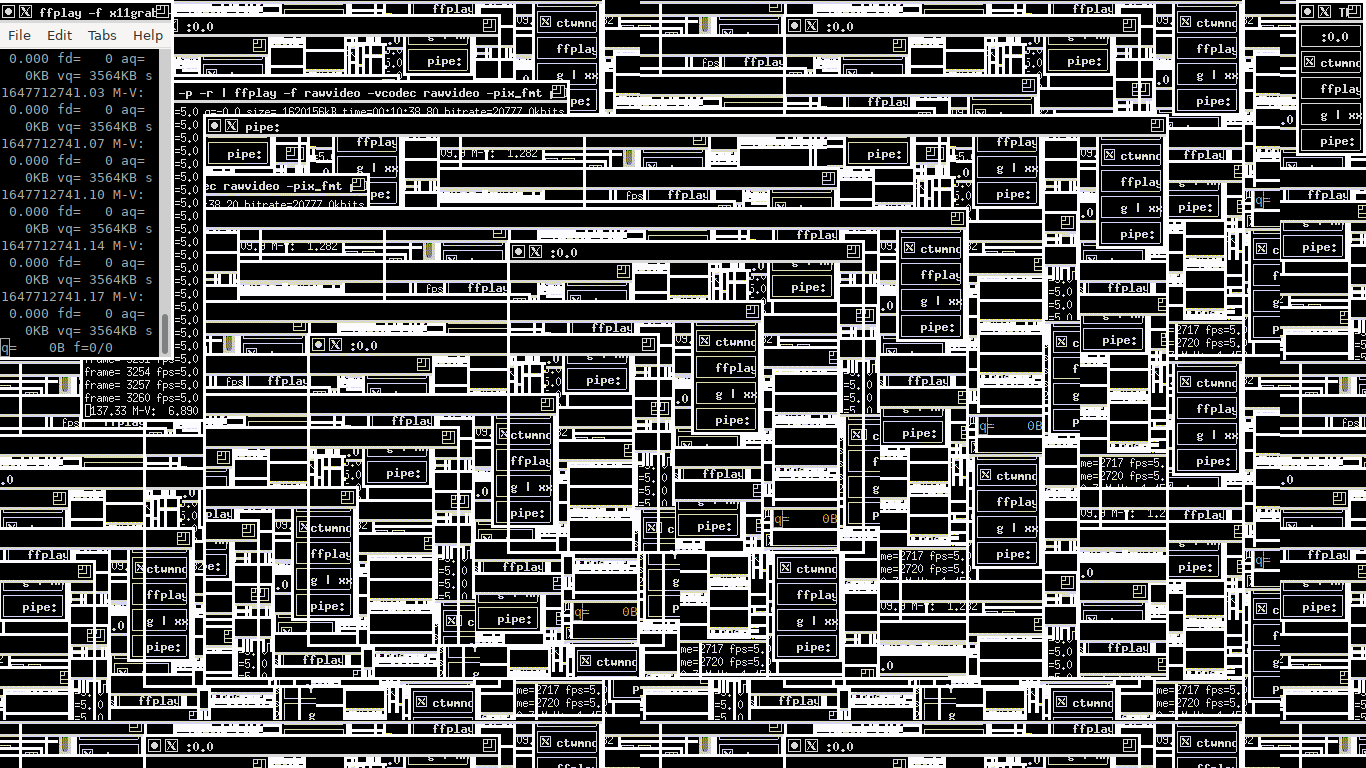
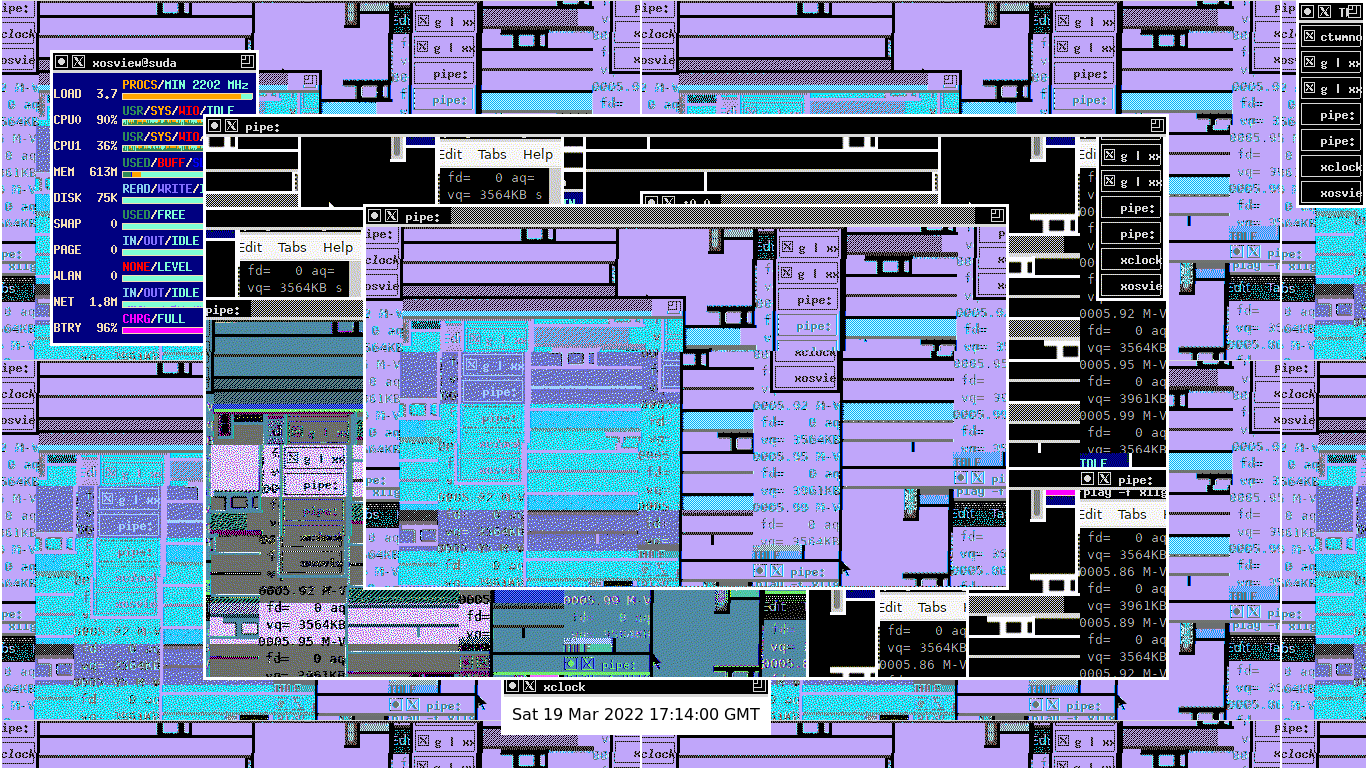
For all intents and purposes sudacam 1 and 2 are the same script. What do they do ? sudacam1.sh opens an lxterminal from which the script opens an ffplay window on the desktop at 640x480 resolution ( this coincides with the online suda as that display is 1024x768) using the mouse location as a kind of lens or focus point, the window displays what the mouse is hovering over. Sudacam2 opens another lxterminal from which the script opens a smaller ffplay window which is above the previous window which also displays the position the mouse is hovering over , these two windows combined create a feedback environment which then reflects everything going on on the desktop at the time which can generate great visual complexity an example here - https://www.youtube.com/watch?v=G_0Q4mLlTfE . The script being the same for both sudacam 1 and 2 bar changes in size of window this is the basic command for both :
lxterminal --geometry=17x18+0+3 -e 'ffplay -f x11grab -follow_mouse centered -framerate 10 -video_size 640x480 -i :0.0'
Note the '--geometry=17x18+0+3' part which tells lxterminal to be of a certain size at a certain location, the information for this can be obtained by first opening lxterminal, sizing it and placing it how you want then running xwininfo from a seperate terminal to obtain the right coordinates and size information you need more information on xwininfo here https://linux.die.net/man/1/xwininfo . Also note the '-framerate 10' part of the ffplay statement , I've found through experimenting that a lower framerate is better and smoother to use especially with multiple windows on lower powered machines using built in graphics rather than discrete graphics cards and given that suda in all forms runs on fully libre software there are some compromises with video rendering related to missing proprietry blobs.
Manifesto.sh
Manifesto.sh is actually a small script which calls another script, Suda-xdotool-ctwm.sh, on the iso versions I've built, and Suda-xdotool-test-2.sh on the online version - as Ive outlined in a different post here there are significant differences between the two and the way that they act - hopefully we will update the online version to reflect this. So the original manifesto.sh script reads like this - 'xterm -e vim & ./suda-xdotool-test-2.sh' , it calls an xterminal which then executes (starts) a vim session , then on executing the ./suda-xdotool-test-2.sh after text is written into the vim window at intervals. This posed several problems in that once the suda-xdotool-test-2.sh is running its almost impossible to stop as it doesnt have a terminal associated with it to exit , the vim window can be closed but the script will keep trying to interact with the desktop in unexpected ways , sometimes this is fun but a lot of the time it can become frustrating ( though that in itself might be an interesting avenue to follow - a desktop environment which always hangs on the edge of usuability tharting and frustrating the user in their tasks !) . To get around that in the iso versions i came up with this
'xterm -e vim & lxterminal --geometry=23x12-4-35 -e ./suda-xdotool-ctwm.sh'
which calls the newer version of suda-xdotool-test-2.sh ie suda-xdotool-ctwm.sh via a second terminal ( lxterminal) which stays open on top of the terminals opened by sudacam 1 and 2 and allows the option to terminate the script if needed. Along with the alterations to suda-xdotool-test-2.sh outlined elsewhere on this wiki this works a lot more smoothly and enables these scripts to be executed automatically and succesfully postlogin on the isos so once they are booted into the desktop the desktop is as would see with a fresh start of the suda online installation.
Additions
There is also one new script addition that I've worked into the isos Ive created using both Trisquel 10 and Gnuinos Chimera . I've added a new menu item in the suda menu in ctwm called Norandom. This script replicates in part what glitchify.sh does but allows us to snapshot the desktop and save those snapshots if needed - it relies on a program called xloadimage to change the background in ctwm and also on scrot ( simple screenshot) for taking screenshots
The script norandom.sh calls a second script called ctwmnorandom.sh which handles the screenshotting and display .
no random.sh looks like this ' xterm -e ./ctwmnorandom.sh'
ctwnnorandom.sh is a little more complicated but looks like this :
!/bin/bash
#run if using ctwm or similar
echo "Press CTRL+C to stop..."
for ((;;))
do
sleep 35
scrot -o -z -a 364,226,640,360 $n /home/crash-stop/background.png
xsetbg background.png
#uncomment below if you want to keep images change 1366,768 to screen dimension
#scrot -z -a 0,0,1366,768 /home/crash-stop/Pictures/'mantissa-%y-%m-%d-%H_%M.png'
done
This takes pictures of a specific area of the display (again using xwininfo to determine the co-ordinates) saves that as a png called background.png then we use xsetbg to set that as the background. Again complexity can arise from simple beginnings for example
And if we change sudacam 1 and 2 to something more complicated like this
xterm -e 'ffmpeg -f x11grab -follow_mouse centered -framerate 5 -video_size 640x480 -i :0.0 -f rawvideo -vcodec rawvideo -pix_fmt pal8 -s 640x480 - | xxd -p | sed 's/808/181/g' | xxd -p -r | ffplay -f rawvideo -vcodec rawvideo -pix_fmt pal8 -s 640x480 -'
we can introduce hex editing and strange colouration (via the pal8 pixel format) to the feedback windows that sudacam1 and 2 provide like this
No comments to display
No comments to display